
Do you want to start a little project that is both super fun, provides fast results, is kid friendly, and delivers delicious, nutritious, edible results? This is for you. I’m talking about growing sprouts. I have always been a fan of this nutty, flavorful addition to salads and sandwiches. Sprout, veggie, and hummus sandwich? Yes, please! And it’s a working science experiment in your home that takes about a week from start to finish. Think of all of the homeschooling potential for those with kids while we are all in quarantine!

At a time where we are seeing and hearing so much about the end of life from something from which we have limited control, it’s nice to start some life. That’s one reason growing our own food gives us a sense of control and value in how we spend our newly found extra time.
Back in my more extreme homesteading days, I almost always had a batch of sprouts going. However, once I went back to work full time, I gradually reduced the projects I had going around the home, and this is one that suffered. I never really thought about it once I dropped back to part time work unless I was in the store buying produce. Now that I have no work during this pandemic, and with our food supply in question, I decided it was time to grow these again. And because, well, I was craving them! I was lucky that I picked up a packet of seeds the last time I saw them. I was in Strange’s Garden Center here in Richmond buying plants for a science project for my younger daughter. This was long before the pandemic hit US soil.
You may have seen or read some stories about recalls of sprouts for bacterial contamination. And, yes, this is prevalent in commercially grown sprouts. A lot can grow in warm, wet environments, and not all of it is good! Many grocery chains have simply stopped carrying sprouts all together. I think you definitely have more control over the cleanliness of the results in your own home. Plus, you grow such a small amount at a time and eat the results so quickly, you limit bacterial growth. However, it is important to know and acknowledge that there is a risk of bacterial contamination when growing sprouts, and this could potentially cause food poisoning. You can reduce this risk by disinfecting your seeds before you sprout them. You may find that home grown is super easy and the results tastier than what you can buy in the grocery.
Check out this article for more information about the relative risks and benefits of eating sprouts. The Botanical Interests website has valuable information about growing and disinfecting seeds. And I found this article for additional methods for disinfecting your seeds as well as using the seed sprouting box. If you use this vinegar method discussed in the above article for disinfecting your seeds, you can do it in the same jar that you will use for sprouting.
Here’s what you need for the jar method:
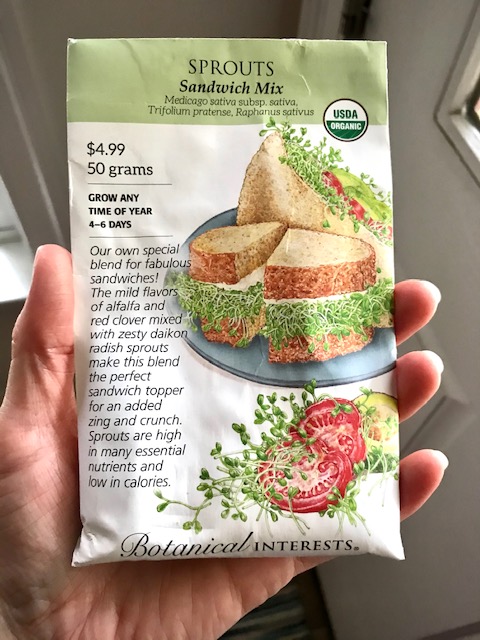
- Good quality sprout seeds. I love these from Botanical Interests. I bought mine locally in Richmond at Strange’s Garden Center, but they are also available online here, or alfalfa sprouts of the same brand here on Amazon via Whole Foods. You may be able to purchase these at a local garden center yourself. This particular brand is organic and lab tested for contaminants. Buy whatever variety you like. I really enjoy the blends for salads or sandwiches. You get a nice variety of flavors and textures with the blends.
- A sanitized jar. Washing in the dishwasher works just fine. I used a quart size jar here to allow for growth.
- A sanitized canning rim. Again, dishwasher works!
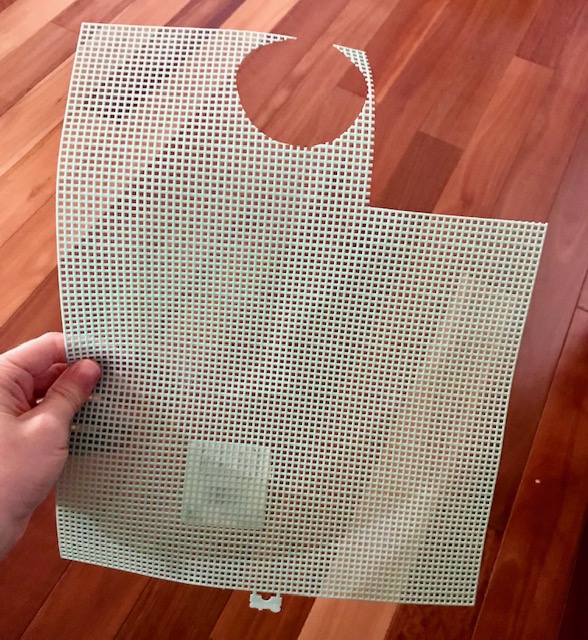

- A screen of some kind to cut to fit per the diameter of your lid. I suggest using clean kitchen shears to cut. I used a plastic needlework canvas which are readily available from Amazon, Michael’s, Walmart, or Joann’s. Michaels and Joann’s have online ordering and curbside pickup at this time. You can also use part of a fine mesh strainer if you have one that has already seen better days; just be careful of sharp edges under the rim. These commercially made screen jar lids are also available on Amazon. Wash prior to use.
- Alternatively, you can use one of these adorable sprout growing boxes. These are also available at Strange’s if you are local to Richmond. I had one at one time, but can’t find it! So I’ve reverted back to the jar method.
- Clean hands. It’s really important that your hands are clean every time you handle your jar and seeds!
Here’s how to grow them using the jar method:
- WASH YOUR HANDS!
- Set up your jar. After you cut the screen to fit your lid with clean kitchen shears, place it on the inside of the lid. You may have to trim it a bit to improve the fit. It should be snug.
- Pour enough of the seeds into the jar to loosely cover the bottom of the jar (about 1 T; and if you used the vinegar disinfecting method, you’re already at this step!)
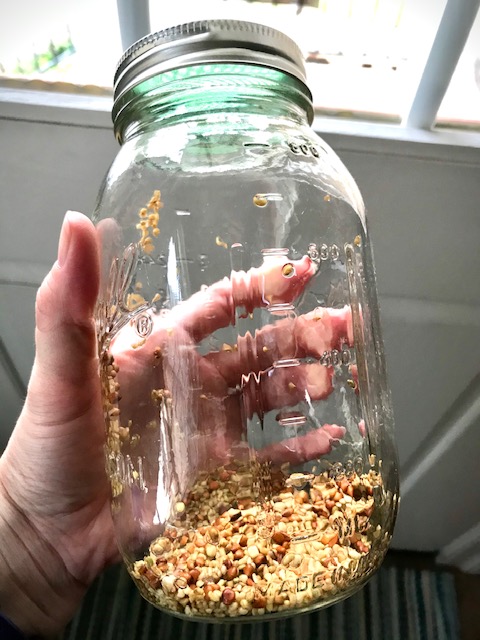
- Place the lid on the jar.
- Fill the jar with water and allow the seeds to soak overnight.
- Drain the jar, placing your hand over the screen to help keep the seeds from slipping through your netting. Again, make sure your hands are clean!
- Rinse your seeds twice daily, filling the jar with enough water to generously cover the seeds/sprouts, swirling, and draining as above. Keep your jar at room temperature.

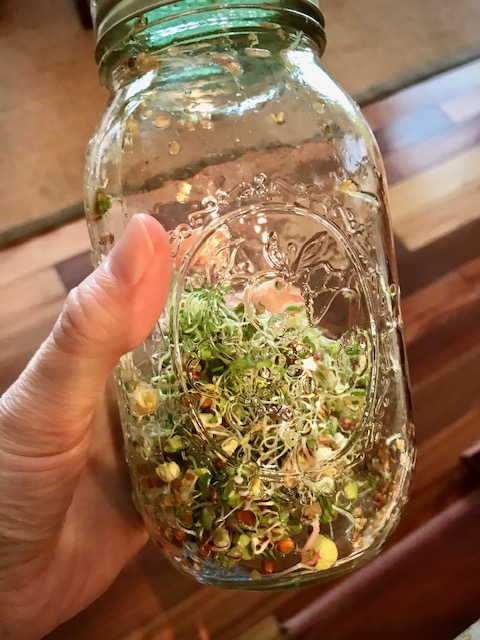
- Once your sprouts seem to have grown to capacity with very few unsprouted seeds, you can remove the sprouts and store in a separate, clean container in the refrigerator, and then start the fun all over again! I place the jar and lid (with screen intact) in the dishwasher to clean between batches. Sprouts will store in the fridge for about a week.
I’m on my third round of homegrown sprouts this “new” growing season. I will never go back to buying them in the store. They taste so much better grown at home!
If you try this, let me know how it goes! I give this information to you with no assumption of responsibility for contaminated seeds or unsanitary growing conditions. I hope you all are safe and healthy.
